

DIY Euro mount

-
Mike20

- Posts: 7
- Joined: Wed Feb 19, 2020 1:17 am
- Location: Western Wisconsin
- Status: Offline
DIY Euro mount
I skullcapped my 2019 buck and left it in the pole shed over summer, noticing that fly larvae (maggots) did a pretty good job of cleaning up the remaining meat and brain bits. Now I'm thinking this may be something to try for future Euro mounts. Anyone ever give it a try? Little smelly, there's that ...
-
Tufrthnails

- 500 Club
- Posts: 3130
- Joined: Sat Sep 12, 2015 7:40 pm
- Location: Knee deep in FL Muck!
- Status: Offline
Re: DIY Euro mount
I’ve done several in the ground with a 50gal drum flipped over to cover them with some blocks on top to keep critters out of it.
Tuf- The below average hunting beast
-
JP BowHunter
- Posts: 195
- Joined: Tue Jan 19, 2021 12:28 am
- Status: Offline
Re: DIY Euro mount
Tufrthnails wrote:I’ve done several in the ground with a 50gal drum flipped over to cover them with some blocks on top to keep critters out of it.
Can you show us what you mean. Do you bury them or something? I’d like to see the end results if you have any pictures laying around.
-
Tufrthnails
- 500 Club
- Posts: 3130
- Joined: Sat Sep 12, 2015 7:40 pm
- Location: Knee deep in FL Muck!
- Status: Offline
Re: DIY Euro mount
Sure I’ll dig through the pics when I get minute. But I got one out by the creek now under the drum. I’ll get some pics of the progress tonight if I can remember to. I’m curious how it’s progressing anyways I put it down there back at the beginning of dec after I got back from KY.
Tuf- The below average hunting beast
-
UntouchableNess

- 500 Club
- Posts: 2071
- Joined: Tue Aug 16, 2011 9:28 am
- Location: Eastern Iowa
- Status: Offline
Re: DIY Euro mount
This fall, I cut the ears off my bucks' skull and planted it in the ground to the base of the antlers. I had an empty plastic livestock mineral lick container that I covered it with, set a 50 lb chunk of concrete on top to hold it in place. First time attempting this, will know late this spring how it worked. I'll probably hit it with some strong hydrogen peroxide to whiten it if needed.
-
Tufrthnails
- 500 Club
- Posts: 3130
- Joined: Sat Sep 12, 2015 7:40 pm
- Location: Knee deep in FL Muck!
- Status: Offline
Re: DIY Euro mount
This is one I am doing for my cousin I actually meant to bring it to deer camp this year and whiten it while we were all there to show them how to whiten them. The dirty pics are right after I got it out from under the drum the cleaner pics are after a quick rinse with the hose.
You do not have the required permissions to view the files attached to this post.
Tuf- The below average hunting beast
-
Tufrthnails
- 500 Club
- Posts: 3130
- Joined: Sat Sep 12, 2015 7:40 pm
- Location: Knee deep in FL Muck!
- Status: Offline
Re: DIY Euro mount
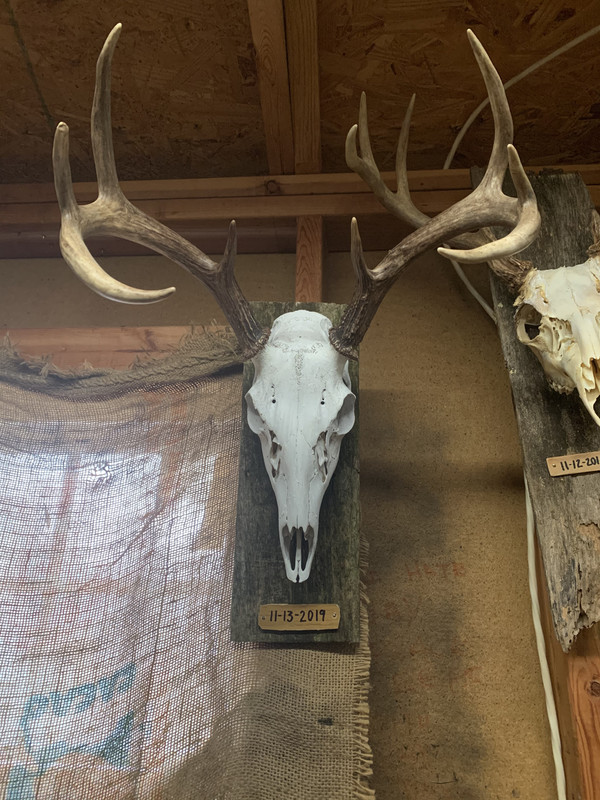
This is my 2019 buck finished. I don’t have the pics from when pulled from under barrel. Don’t remember if I even took any.
The cow horn spike is my nephews first buck. I did it the simmer method.
The cow horn spike is my nephews first buck. I did it the simmer method.
You do not have the required permissions to view the files attached to this post.
Tuf- The below average hunting beast
-
hcooper84

- Posts: 431
- Joined: Fri Jun 07, 2019 7:51 am
- Location: Southern Illinois
- Status: Offline
Re: DIY Euro mount
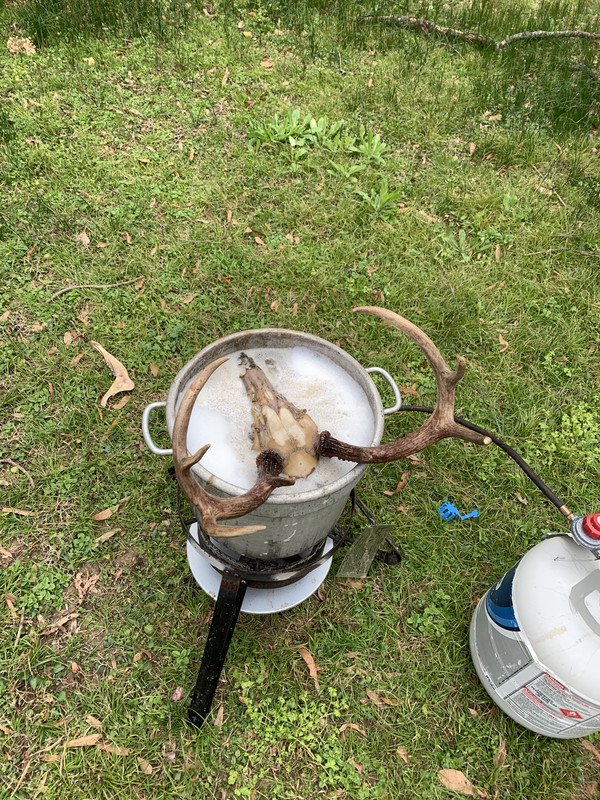
I started boiling my own this year. Cape and cut off as much meat as possible. Got a propane burner for Christmas $40-60. I had my dad weld me up a metal tub to put them in, but you could buy the whole turkey fryer kit and just use the metal bucket that comes in it. Then just add some borax to the water and start boiling away. After hour 2 I will pull the head out, cut off as much as possible, remove bottom jaw. Then let it boil for another hour. When I say boil it's more of a simmer. After the third hour I take the pressure washer to it. Might have to use a small rod to get some small gunk out but does the job good. I have an initial investment of $70-100. Maybe a pressure washer too if you don't have one. Then just the $10 of propane or so per a head. Can do them for a lifetime now, could even charge a small fee to do them for others as well.
-
Tufrthnails
- 500 Club
- Posts: 3130
- Joined: Sat Sep 12, 2015 7:40 pm
- Location: Knee deep in FL Muck!
- Status: Offline
Re: DIY Euro mount
This is my sons buck from last year. Been in there since early dec. needs another couple months.
You do not have the required permissions to view the files attached to this post.
Tuf- The below average hunting beast
-
Grizzlyadam

- 500 Club
- Posts: 1496
- Joined: Sun Jan 07, 2018 11:33 am
- Location: CT
- Status: Offline
Re: DIY Euro mount
hcooper84 wrote:I started boiling my own this year. Cape and cut off as much meat as possible. Got a propane burner for Christmas $40-60. I had my dad weld me up a metal tub to put them in, but you could buy the whole turkey fryer kit and just use the metal bucket that comes in it. Then just add some borax to the water and start boiling away. After hour 2 I will pull the head out, cut off as much as possible, remove bottom jaw. Then let it boil for another hour. When I say boil it's more of a simmer. After the third hour I take the pressure washer to it. Might have to use a small rod to get some small gunk out but does the job good. I have an initial investment of $70-100. Maybe a pressure washer too if you don't have one. Then just the $10 of propane or so per a head. Can do them for a lifetime now, could even charge a small fee to do them for others as well.
I do pretty much the same thing but I simmer it really low for most of a day so the teeth don't fall out. The pressure washer is very helpful, I've done it both ways and it saves hours. I usually get them from the field to the wall within two days. About six hours will get one done.
You do not have the required permissions to view the files attached to this post.
-
Bonecrusher101

- 500 Club
- Posts: 3091
- Joined: Sat Mar 21, 2015 3:09 am
- Location: West TN
- Status: Offline
Re: DIY Euro mount
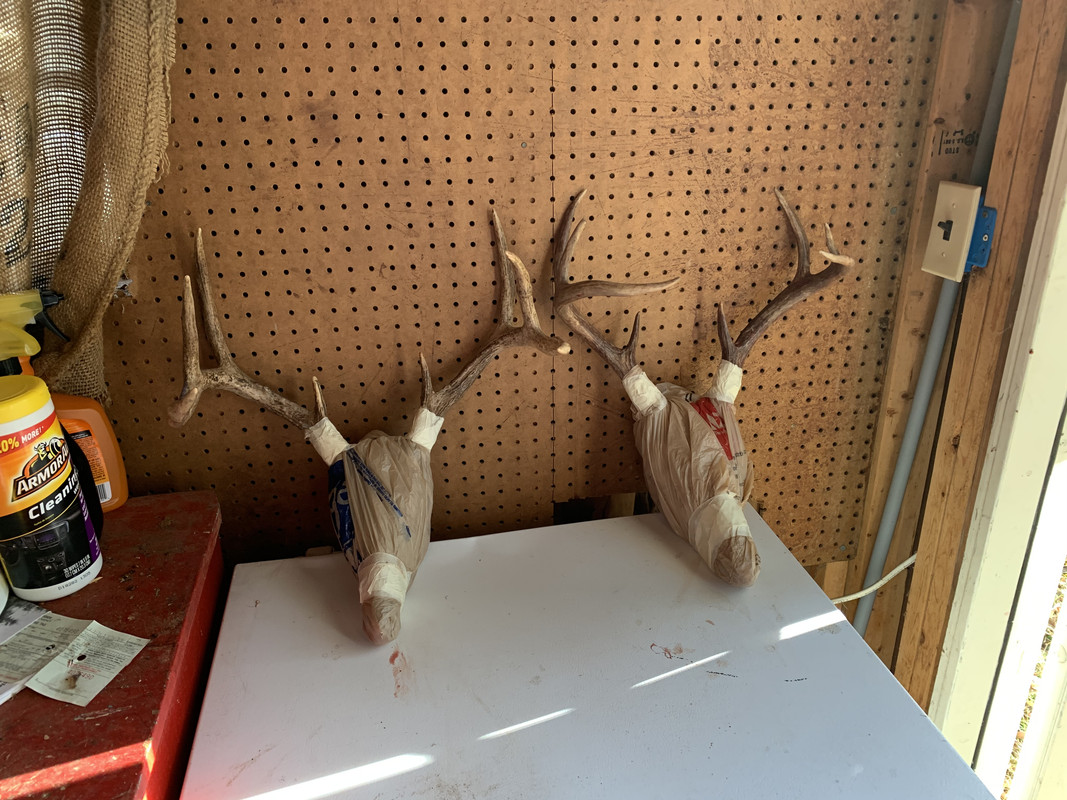
So here’s how I’ve been doing mine and it works ok for me.
I cut the hide off of the head then put them in a doubled up plastic grocery bag. I tape them off around the antlers and let them sit in my shed for a week or two. By then, I’ve already cut up and vacuumed sealed all the venison and hauled off the remaining carcass.
After a week or two sealed off in the grocery bag they really get slimy and the meat breaks down fast. Then when I boil them the meat falls off the skull much easier with much less effort than if I didn’t bag it.
The skulls that I immediately boiled or just set out without a grocery bag on them would air dry and freeze and the meat really gets stuck to the bone. It takes a lot more time boiling and a lot more effort to get the meat to come off if I don’t bag it for a week or two.
Im frugal and don’t like going to the store, so I don’t buy borax or peroxide paste, I just use what I’ve already got around the house. I use a heavy dose of dawn dish soap in the boiling water to help break down the fats. I’m ok with some of the yellowing for my skulls that go in my shed. I have done a few euro mounts for other close friends and I have painted them white with killz to get them bright white and they turn out nice I think. I Just use a 2 inch brush for the big broad areas and a small detail paint brush for all the crevices.
 upload pic without registration
I cut the hide off of the head then put them in a doubled up plastic grocery bag. I tape them off around the antlers and let them sit in my shed for a week or two. By then, I’ve already cut up and vacuumed sealed all the venison and hauled off the remaining carcass.
After a week or two sealed off in the grocery bag they really get slimy and the meat breaks down fast. Then when I boil them the meat falls off the skull much easier with much less effort than if I didn’t bag it.
The skulls that I immediately boiled or just set out without a grocery bag on them would air dry and freeze and the meat really gets stuck to the bone. It takes a lot more time boiling and a lot more effort to get the meat to come off if I don’t bag it for a week or two.
Im frugal and don’t like going to the store, so I don’t buy borax or peroxide paste, I just use what I’ve already got around the house. I use a heavy dose of dawn dish soap in the boiling water to help break down the fats. I’m ok with some of the yellowing for my skulls that go in my shed. I have done a few euro mounts for other close friends and I have painted them white with killz to get them bright white and they turn out nice I think. I Just use a 2 inch brush for the big broad areas and a small detail paint brush for all the crevices.
upload pic without registrationBe original and Enjoy every step along the adventure.
-
hcooper84
- Posts: 431
- Joined: Fri Jun 07, 2019 7:51 am
- Location: Southern Illinois
- Status: Offline
Re: DIY Euro mount
I do not do the whitening part. I prefer the natural bone look.
-
UntouchableNess
- 500 Club
- Posts: 2071
- Joined: Tue Aug 16, 2011 9:28 am
- Location: Eastern Iowa
- Status: Offline
Re: DIY Euro mount
I’ve done the boil as well, trying the bury method out of being lazy.
-
UntouchableNess
- 500 Club
- Posts: 2071
- Joined: Tue Aug 16, 2011 9:28 am
- Location: Eastern Iowa
- Status: Offline
Re: DIY Euro mount
UntouchableNess wrote:I’ve done the boil as well, trying the bury method out of being lazy.
In the house.

-
Tufrthnails
- 500 Club
- Posts: 3130
- Joined: Sat Sep 12, 2015 7:40 pm
- Location: Knee deep in FL Muck!
- Status: Offline
Re: DIY Euro mount
UntouchableNess wrote:UntouchableNess wrote:I’ve done the boil as well, trying the bury method out of being lazy.
In the house.
Your either brave, stupid, or not married!!!!!
Tuf- The below average hunting beast
-
- Advertisement
Who is online
Users browsing this forum: No registered users and 12 guests